After you carefully plan out your pond, you can begin building it. Always be careful to not damage electric, water, or gas lines. Sprinkler lines are only buried about six inches deep, so they are one of the first things that you may find. They can be fixed, or rerouted pretty easily. Another obstacle that you may run into are roots. It’s a good idea not to get too close to trees. cutting large roots can not only hurt the tree, but also affect it’s stability in a storm.
While digging your pond, you must be aware of the grade of the land, and keep your pond level. I have a video below about building your pond on a slope. I use a laser to check that my pond is level, but a cheaper option is a string and a line level. Always be aware of the depth as you dig for shelves or different levels. (especially for a water garden, where you will be using many plants where you may want shelves at different levels).
Take your time, don’t just dig a hole, sculpt it’s shape. If you are using a preformed shell, dig your hole as close to the shape of the pond as possible. A liner can fit just about any size or shape. If using a liner, the most popular choice is a 45 mil EPDM rubber liner. They are available in many different sizes, and they are flexible to help resist punctures. They are also great for installing bottom drains and skimmers.
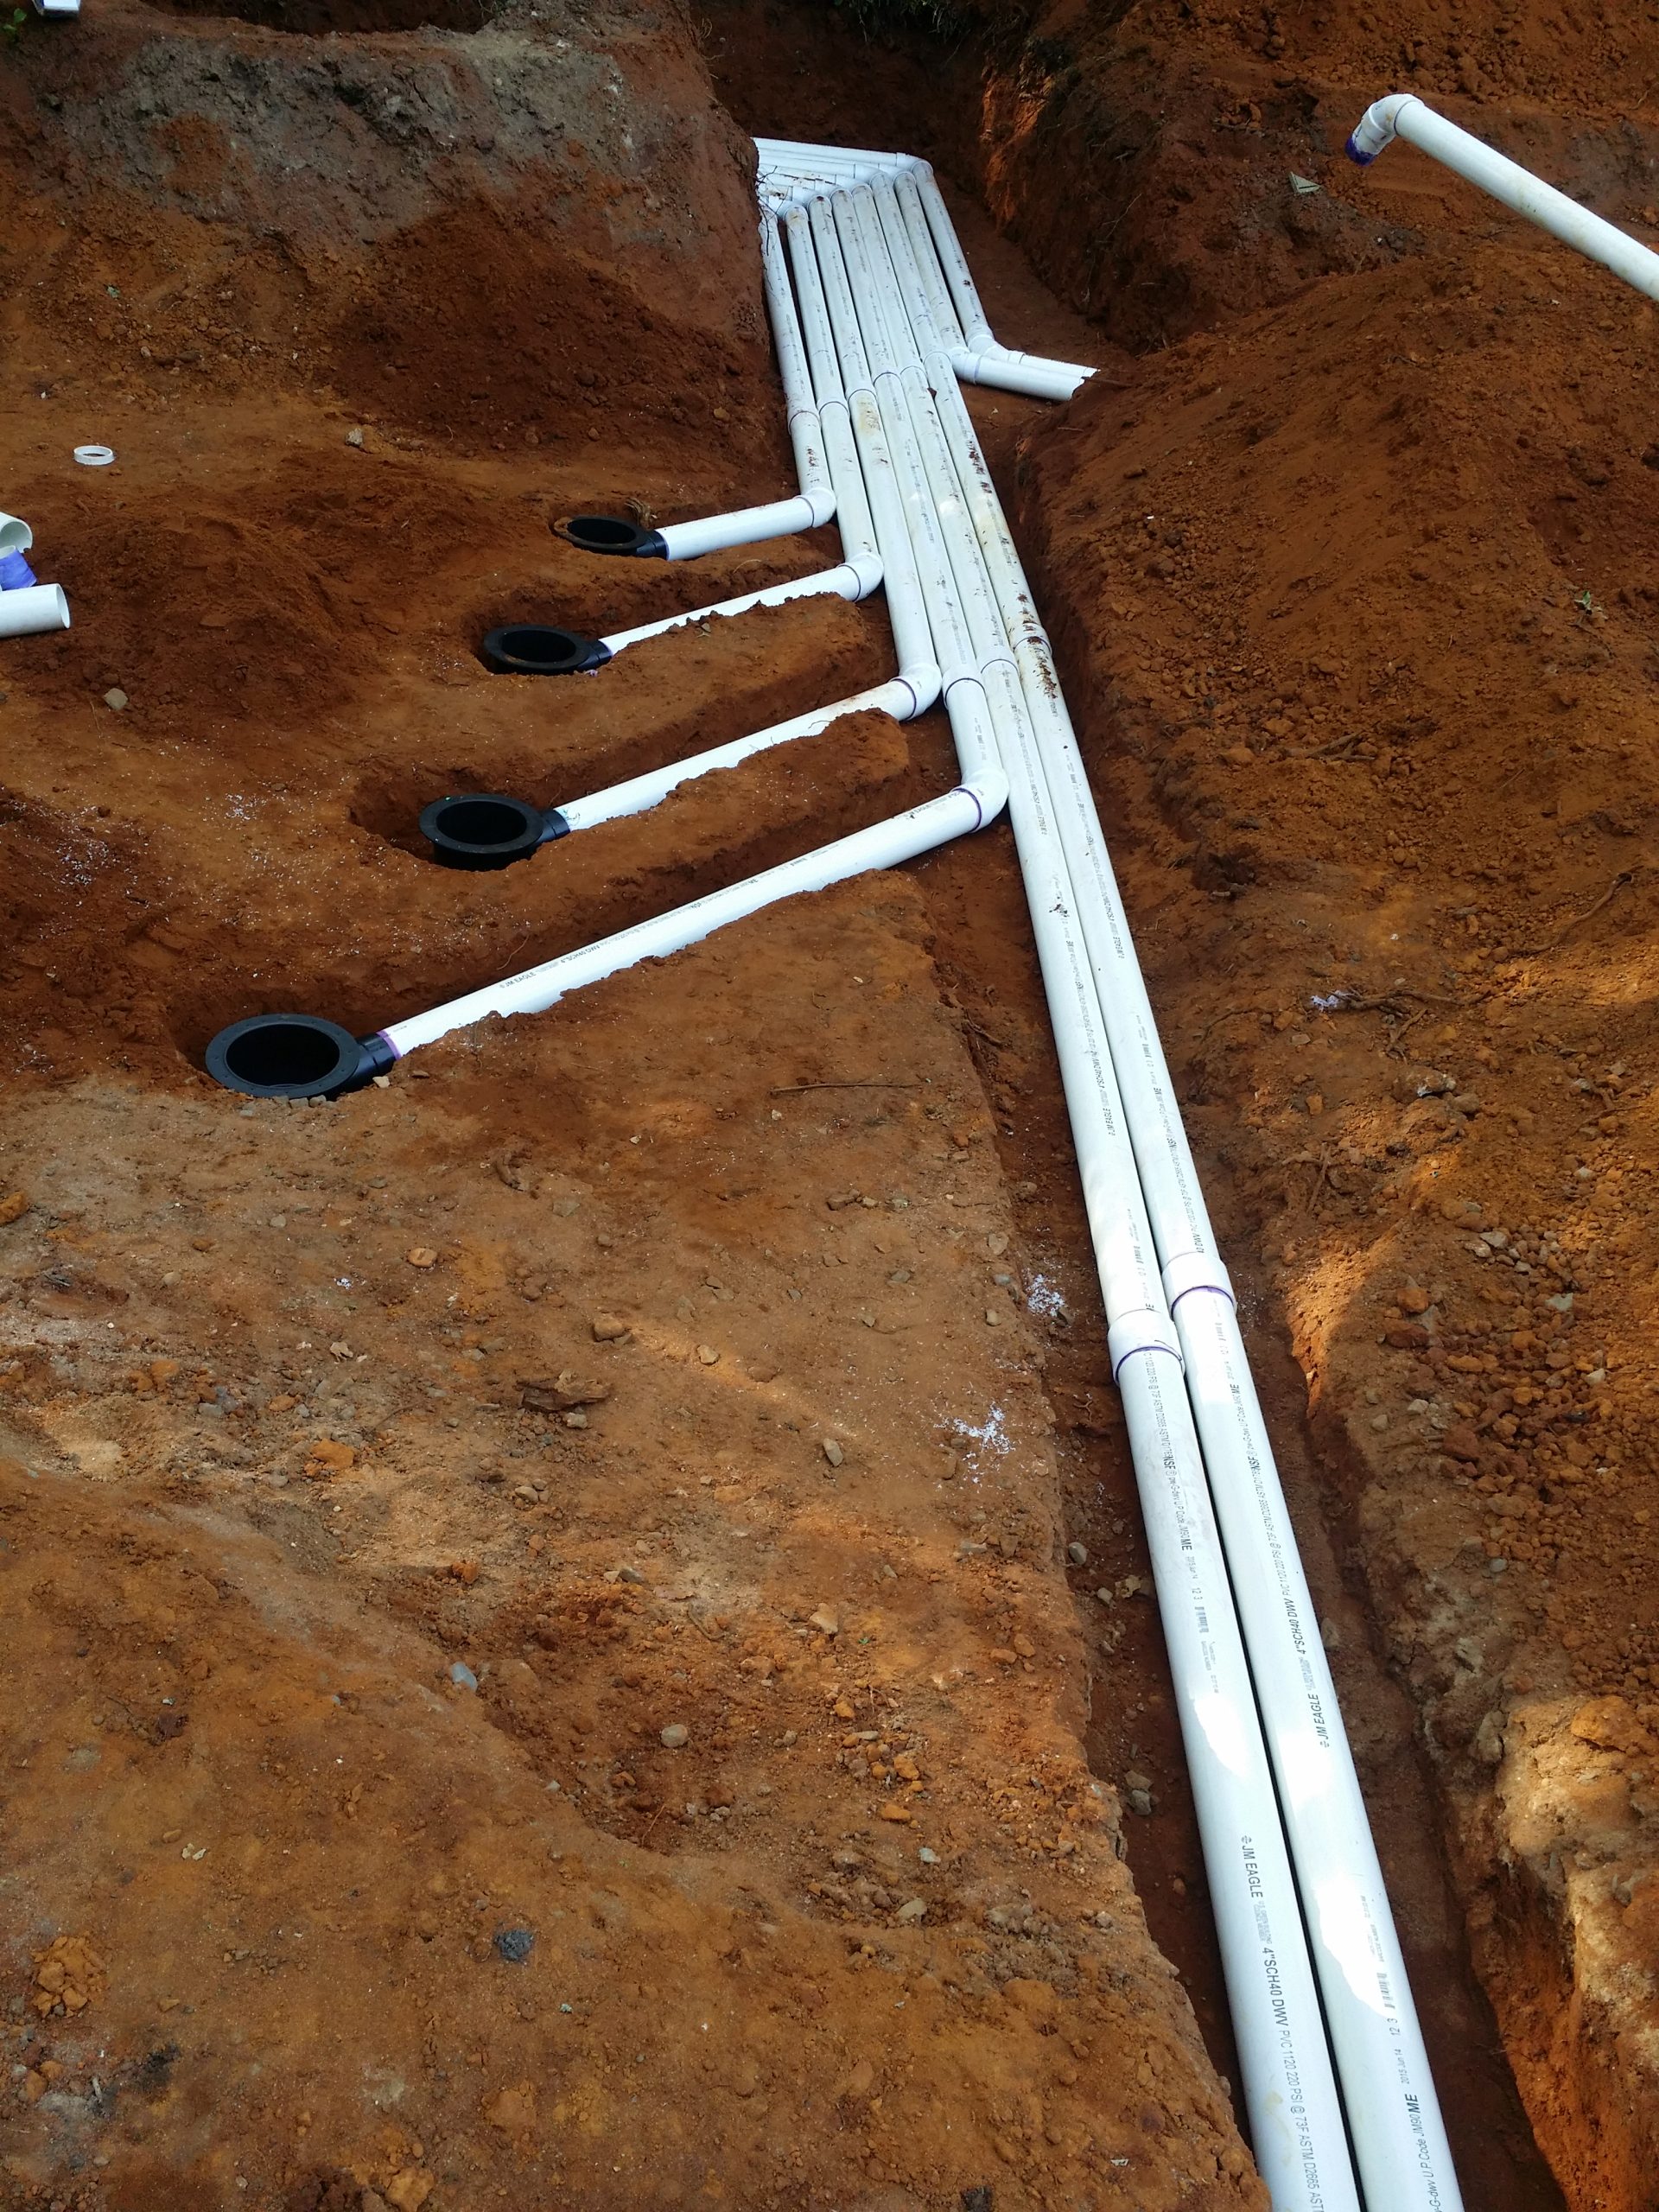
I always install bottom drains and gravity fed filter systems in all of my ponds. So, once the hole is dug, I need to install all of the PVC pipes for the bottom drains to the filter tanks, and set skimmers before putting in my liner. For more information on gravity fed filter systems, see the slider at the top of the front page of this website, and scroll to the page on filtration.
If you plan to build a waterfall or stream on your pond, try to use just one liner for both the pond and waterfall or stream. This way, there are no seams making it less likely to leak. Sometimes, adding additional layers of liner under large boulders as a cushion is a good idea to help prevent punctures.
A large pond with four 4" bottom drains, and two 4" PVC pipes connecting a large skimmer to the gravity fed filter tank. The picture below shows the skimmer.
A waterfall or stream must be included into your plan when designing your pond. The waterfall is a major part of your pond. Attracting a lot of attention, providing oxygen into the water, and generating a relaxing, soothing sound. It is important that you match up a pump for your pond that is appropriate for your filter system, and suites the needs of your waterfall or stream. The videos on the left will help you understand how to build a waterfall or stream. There are many different designs and concepts for what type of waterfall or stream to build.
For me, I like using the same types of rock for my waterfalls as I use around the entire pond. There are some preformed waterfalls available, that can just be placed on the side of your pond, but they simply look “fake” to me. Building a waterfall is not easy, it takes time. Each rock must be placed individually, and no two waterfalls are the same. Concrete may be needed to hold rocks together, and fill in gaps between boulders. A spray foam is also sold for this purpose, but I don’t recommend using that as it is more expensive, and over time deteriorates. There are also filter boxes that have a spillway that can be used as well at the top of a waterfall, or head of the stream. Be careful when using them, not to make your waterfall look like a pile of rocks hiding a filter box!
Always Use the best materials for your pond construction. Your fish will thank you for it! Build it once and build it right. Skimping on quality parts will only cost you more later.